|
Analysis Setup Tab
|   |
|
Analysis Setup Tab
| |
The ANALYSIS Setup Tab
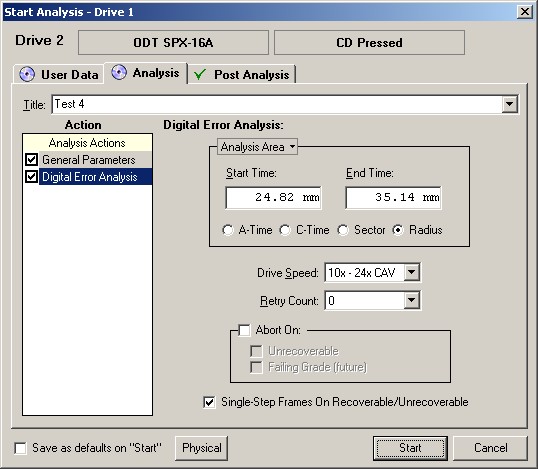
![]() ANALYSIS TAB – the test analysis screen has many options. The first prompt is for the test title. This is not the saved file name but a sub descriptor for the test. This title is limited to 255 characters. The file name and test name can be made the same (see Tools/Options menu) or they may be incremented with the test/file name programming language (see programming functions).
ANALYSIS TAB – the test analysis screen has many options. The first prompt is for the test title. This is not the saved file name but a sub descriptor for the test. This title is limited to 255 characters. The file name and test name can be made the same (see Tools/Options menu) or they may be incremented with the test/file name programming language (see programming functions).
Digital Error Analysis Action
Analysis Area – choose the start and end time of the test. This can be defined by using A-time, Track time or C-Time, Sectors, or Radial position. The radial position mode may be used to monitor the physical position of a flaw. It also adds a third axis to the error graphics. By moving the Mouse over the Analysis area tab we can select specific Sessions for testing.
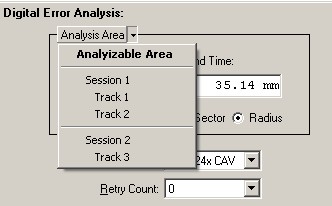
Selecting Sessions and Tracks
If we want to add radial position to our graphics screens we can select "Radius" in the Analysis Area. If we select radius we will need to click on the Physical button in the lower left hand corner of the Analysis Area tab. We should see the following screen.
Note: Radial position requires knowledge of the mastering parameters. To define these parameters click on the Physical button at the bottom of the Analysis screen.
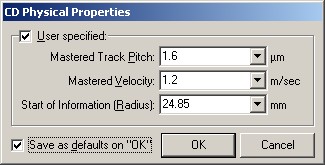
User Defined Inputs for the Radial Position Option
Drive Speed – choose analysis speed. A CD test may be run at 4X CLV, 8X CLV or 10-24X CAV. A DVD test may be run at 2X CLV, 2-5X CAV, 3-8X CAV, and 5-12X CAV.
Retry Count – If a drive looses synchronization during analysis it will normally try to re-synchronize at a lower speed with more available error buffering. There are many different strategies. The number of retries can be set if you wish to use this option.
Abort Sequence – A test may be aborted on a loss of Synchronization or because of a failing analysis grade.
Single Stepping Mode – the drive will single step frames on an unrecoverable or tracking error.
DANGER: the drive can run for long periods of time in this mode. Care should be taken so that the drive is not left unattended when using single stepping mode. Extensive use of this mode can shorten the life of the drive.
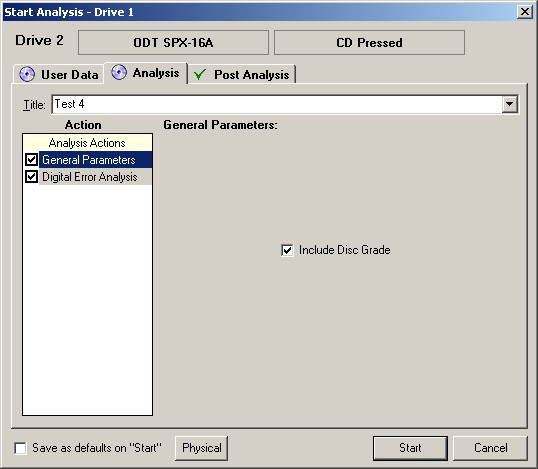
General Parameters Action Screen
At this time the General Parameters Screen is only used to add the Disc Grade Function to the running screens.
Save Defaults on “Start” – Make the setting default for automated or quick testing mode. The Defaults are specific to Disc Media type…If you put another type of media in the drive the analyzer will look for a different default setup!
NOTE: If the Save Defaults button is not selected the software will revert back to the previous settings!