|
Post Analysis Options Tab
|   |
|
Post Analysis Options Tab
| |
The POST ANALYSIS Options Setup Tab
![]() Post Analysis Options Tab – automated testing options and file saving paths. The are 6 defined operations that can be checked on or off in the Post Analysis Screen.
Post Analysis Options Tab – automated testing options and file saving paths. The are 6 defined operations that can be checked on or off in the Post Analysis Screen.
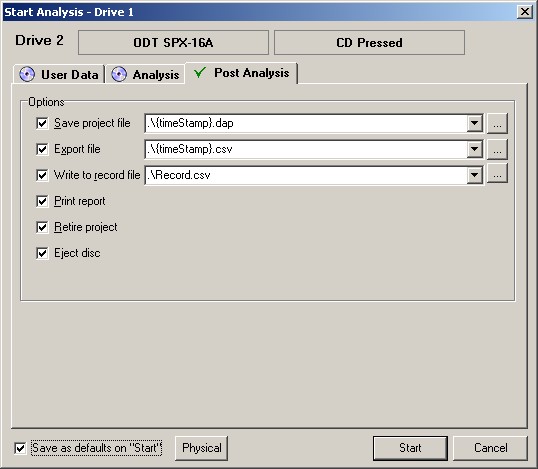
Post Analysis Tab under Startup Screen
Save project file – file name and path for automated save of a project file or *.dap files.
Export analysis data – file and path for export of a Raw data file. This file may be exported in “*.csv or *.txt” format.
Write to Log file – file and path for single line addition of summarized data to a Log file (CSV format) .
Print report – pre-formatted report sent to printer automatically on completion of test.
Retire Project – do not erase data but create a new project tab for this information on the running screen.
Eject Disc – automatically eject the disc after completing the test and the above actions.
Note: be sure and check the “Save as defaults on Start” box in the lower left hand corner of the Post Analysis screen to save the checked options profile. This Post Analysis Options Profile is saved in the registry of the operating system once the test is started.
The Browse buttons * at the end of the first three Post Test options can be used to set the file saving paths for those options.
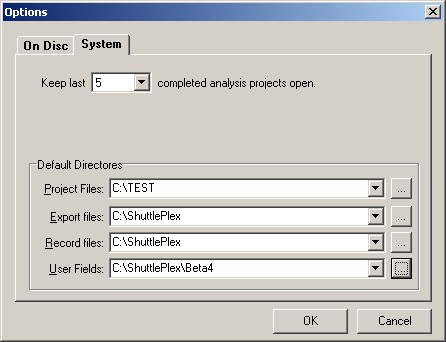
If you would like to access the file paths without initializing the start menu then go to the Tools Menu, choose Options and highlight the System Tab. You will see the screen and setups below.